My MKI speedometer was jumping at speed so I decided to clean and lubricate it. The following is what I learned from first disassembling and cleaning an Alpine speedo and then the Tiger unit. They are essentially the same, and the procedures are the same.
Disassembly
Note: All references are looking at the speedo as you would in the car. A reference point on the speedo is the odometer shaft, which is pointing down in the car.
After removing the speedo from the car, place it on a clean work surface. The bezel is removed by turning the bezel on the speedo container, which I will call the can.
You may have to bend the tabs on the back of the bezel to loosen it. It also helps to use a rubber jar opener to grasp the bezel while twisting. Align the bezel tabs with slots in the can and the bezel can be removed with the glass and what is left of the gasket sealing the glass to the can. Also remove the inner concave surround, which is tight to the can. Set all these parts aside.
The next step is to remove the speedo needle from the shaft. Be very careful in this step so as not to damage the shaft and needle. Using a nail remover, place the tool fully under the needle so that it is under the needle body, resting on one of the two screws that hold the faceplate to the inner workings.
Gently, but firmly pry up on the needle. It may be on tight, or it may be on loose, or it may fly off into space, so take your time in doing this. Set the needle aside. Remove the two screws holding the faceplate on. Set the faceplate and screws aside.
Turn the faceplate over and note that the needle-rest on the front of the faceplate is attached on the back with a rivet. You will need to note this for the reassembly procedure. Next remove the shaft extension for the odometer reset shaft. The shaft extension is held on to the shaft by either a small screw or a press fit pin that needs to be driven out. If it is a pin, do this carefully and set the extension shaft and pin or screw aside.
Turn the can over. There are two screws in the back that hold the speedo mechanism in the can. Remove these two screws and set them aside. By tilting the mechanism in the can, the speedo mechanism can now be removed.
The odometer-reset shaft has a spring, a small brass washer, a larger copper washer, and a felt washer to keep dust out of the can. Remove them, and set them aside. Next you will remove two small springs. They are the springs that provide tension on the left and right arm that advance the trip and regular odometer. Remove both of these springs, and set them aside. Be very careful with this operation and note how these springs are attached. The spring with the closed loops on each end goes on the trip odometer advance arm. The spring with one end open goes on the regular odometer advance arm.
The next step is to remove the four screws, which hold the front of the speedo containing the odometers and the rear cast part of the speedo. Remove the shorter of the screws at the bottom, (photo 3) and then remove the other three screws at 9, 12, and 3 o’clock, and set them aside. The front and back portion will separate and the trip odometer on the top will come out of the top of the front of the speedo. Set the trip odometer and the front of the speedo aside, being careful with this portion as it contains the delicate assembly of the speedo mechanism, the needle shaft and spring for the speedo.
Disassembly of the Rear of the Speedo
You can now start the disassembly of the rear of the speedo, as well as the cleaning, and re lubrication. The shaft that contains what I think makes the magnetic impulse for the speedo, can now be removed from the cast portion of the rear of the speedo. Remove the two brass screws and the shaft and set them aside. The cast portion contains two gears with shafts, connected to arms, with retaining spring clips that move the two odometers. Remove the spring clip and disassemble the arm and gear and shaft from the cast portion. Do only one assembly at a time so you don’t mix the gears and arm assemblies.
After removal, clean the parts and the bore in the cast piece. I used alcohol and pipe cleaners, which worked quite well. After the parts are clean, lubricate the shaft, arm, and gear, where they come in contact with other moving parts. I applied Lithium grease with a pipe cleaner. Do likewise with the other gear and arm assembly.
Reassembly of the Gear, Arm and Retaining Clip
The cast portion where the moving part is, which I called the shaft with magnetic assembly, can now be cleaned. I cleaned the bore in the cast piece, the shaft, and the brass worm gear. I did not clean the bearing surface of the plate, which has the two brass screws going through, that rides on the center shaft of this mechanism. This area appeared clean, moved freely, and if I did lubricate this area, I would want to use clock oil. Likewise, I did not clean the end of the shaft that the needle shaft rides on. This area appeared clean, and I would also want to use clock oil, if it needed lubrication.
After you have finished this portion, assemble the shaft in the cast portion, and reattach the two brass screws. You have now finished cleaning and lubricating the mechanical back portion of the speedo. I looked at the two odometer mechanisms and they appeared to be clean and did not need to be disassembled, cleaned or lubricated.
The assembly is the reverse. Of course, you will want to clean the faceplate, glass, and add a new sealing o-ring, if needed. I used water and a clean paper towel to carefully clean the parts. Be very careful in putting the two springs on the arms that turn the odometers. They can get away from you very easily, and are hard to replace.
When assembling the front and rear of the speedo, carefully reassemble the parts so the needle spindle mates into the back portion of the speedo. Then put in the four screws to hold this entire assembly together. When you have the front and portion of the speedo together, put it in back into the can with the spring and three different washers on the odometer reset shaft. Then add the screws in the back to hold the speedo mechanism to the can. Place the faceplate on the mechanism and secure with the two screws.
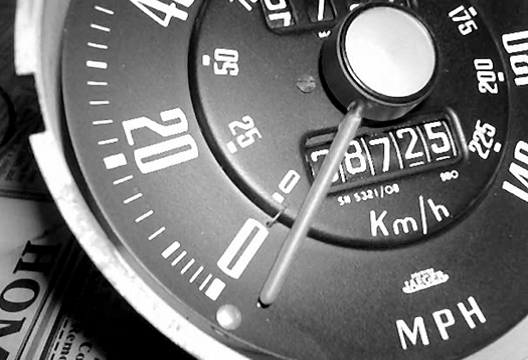
On the faceplate, there is a white dot, which is about minus 5 mph. Carefully place the needle on the shaft so that the needle is pointing at the minus 5 mph white dot. Do this with the speedo in its normal position, i.e. with the faceplate vertical. Make sure that the needle is pointing to minus 5 mph. Now using a small pair of pliers, push the needle stop into the speedo and move the needle to the positive side of the mph. The needle will now be preloaded and rest against the needle stop. I understand that this is how the needle was set up in the factory. Of course, you can check the speedo against other accurate cars or measured courses, at whatever mph you want, and add the preload to adjust the speedo to give an accurate mph at least one speed.
Good Luck with your new speedo!