by Dave Reina
For those of us in the club who own Rootes cars that are convertibles, the time eventually comes when we need a new top. On one hand it hurts to part with the bundle of money that a new top installation costs, but on the other hand it’s nice to think of how pretty our car will look with a neatly-tailored piece of attached vinyl (to say nothing about how nice it will be to see out the back window again.) Over the years that I’ve owned convertible Sunbeams I have always wondered if I could handle the installation job myself. Doing so could cut the total cost about 1/3 to I/ 2 depending on which installation shop does the job. I finally got up the courage to try one. I must say that while this first job took me a long time everything came out fine in the end, and I was happy with the way the top fit and looked.
I would like to say that the job goes best on a nice hot, sunny day so the vinyl can be stretched as the work goes along. Second to this a very warm garage with perhaps a heat lamp or a couple of hot hair dryers. I would like to add that while this job is not impossible for us amateurs to handle at home, it does require patience and time enough to work unhurried. The first time I did the job it stretched out over a week, an hour or two at each session. About the only tool which one might not be able to find around the house is a good pop rivet gun. They are available in hardware stores, rental stores, or perhaps can be borrowed. The tool list is as follows:
- Phillips head screwdriver, medium tip
- Regular blade screwdriver, medium tip
- Two awls or ice picks
- Contact cement (1/2 pint of fresh, good quality cement)
- Brushes (Small 1 ” disposable brushes for application of the contact cement)
- Scissors
- X-acto or utility knife with fresh blade
- Pliers
- Pop rivet gun
- Aluminum rivets (1/8″ diameter, grip range 1/8″. About 15 or less required)
- Chalk, masking tape and a pencil
I would like to mention that there are three different types of tops on the Alpines and Tigers of the sixties. The early Alpines have extra metal bows that snap around the windows to keep a tight seal around the windows. The Series III, IV Alpines and MKI Tigers had what is called a cable top (there is a flexible steel cable that runs through the border of the top around the side windows and is tensioned by a spring hidden by a little metal cover on the top bows).
If you are installing a top of this type, you will need new cables, as this is not supplied with the tops. It is called 1/16″ airplane cable but can be a little hard to find under that name. An easy source for this wire or cable is the bike store where it is sold as replacement cable for 10 speed bikes. When you get a new cable top there will be apiece of string through the channel in the top where the cable will go. Don’t pull this string out!! The idea is to tape the new cable to the string and use the string to pull the cable through.
The other style top is the Velcro top which uses a strip of Velcro to keep the top fitted nicely around the side window. Other than the Velcro-cable difference the Series IV and the Series V tops are the same.
Series IV tops have a thick cloth bead sewn into the back bottom sides which is caught by the metal top concealment covers and which helps keep this pan of the top tight against the body.
The first step is removing the old top in the back under the back window. Unscrew the sheet metal screws that go through the aluminum hold down strip. Also, remove the two shorter copper colored hold down strips. Then, remove the black vinyl hold down strips that are located where the back edges of the side windows meet the top.
Now the top is attached only to the front bow. To remove it from the bow, carefully work the rubber weather stripping out of the groove on the bow. Under this rubber you win see a series of rivets which hold down this weather-strip track. This strip also secures the top material.
This riveted strip is delicate so don’t bend or pry it. Instead, use the drill in the hole that is in the center of each rivet. This drilling will cut off the top of each rivet. Sometimes the rivet will spin and not allow the drill to cut. In this case take a screwdriver and chisel the head of the rivet off.
Now the top is off and you have seen where the points of attachment are. This is a good time to oil all the joints of the top frame and make sure it is adjusted correctly. Notice whether the front bow has an even gap across the length of the windshield when it is snapped up. (There should be a gap which is later sealed by the rubber weather-strip.)
If the gap is not even, adjust the length of the chromed hinged tensioner bars. Another point to check is directly behind the door where the frame is hinged and attached to the body. There is a cam action here that moves the frame in and out as the top is raised and lowered. This action is sometimes hampered by a rusted mechanism. It should be oiled and made to work.
This is also the perfect time to touch up rusted areas on the frame and give everything a fresh coat of paint. It does take some time to do this task. Most rust paints take a full day to dry before they can be recoated with enamel.
On my car I removed the rubber cockpit combing. A lot of dirt collects here. This strip can usually withstand being removed and cleaned with a little solvent. I found rust spots that had begun where the screws went in. Number 220 grit wet or dry sandpaper is good for cleaning up lightly rusted spots. For the final sanding of the frame tubes, a 320 grit wet or dry does a good job of smoothing.
I recommend oiling before painting, and then wiping everything down with a cloth soaked with paint thinner. I’ve noticed people switching from the original gray to black painted frames. Parts of the frame that may need replacing, are the rubberized webbings riveted to the frame rails. They seem to serve the dual purpose of keeping the bows in alignment and preventing the top from fluttering too much.
A non-original but good-looking replacement for these straps is black seat belt webbing. A more accurate replacement can be found in a furniture reupholster shop where they still use the rubberized type. As with most jobs, fussy preparation work is 90% of the job. Once you have the frame into a condition where you will be happy after the top is installed we can talk about the actual installation.
The Installation

- Coat the cleaned rubber (vinyl actually) cockpit edging with contact cement. Coat the body where the edging goes with cement. Let the cement dry to the touch. Use an awl to locate the original holes and press into place.

Fig 2 - Drape the top over the raised framework. Line up the top seams of the top with the bows underneath them.
-

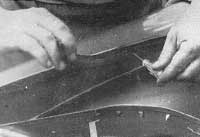
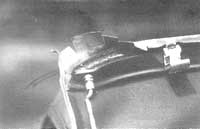
Fig 3 The first important alignment of the top material is the area where the top meets the rear edge of the door window openings. (See photo 3) If the top is too far down at this point the door windows will catch the material. If the top is up too much it will not seal and the metal bows will be visible. The bead of the rain gutter of the top should completely cover the metal bows beneath the material but should not extend past this point. This work can be done one side at a time. When you are happy with a side, use masking tape or have an extra pair of hands hold things in place.
-
Take the vinyl covered metal strip that came from the side you are working on (there is a right and a left side strip) and press it into place over the new material. Push an awl thru a screw hole and the material and find the old screw hole in the frame. Attach it with a screw and continue with the other holes. When you do the opposite side you might have to do some stretching to get the top aligned as described above. Measure and mark the center on the front edge of the top with apiece of chalk. Do the same on the metal front bow with a pencil. (See photo 4)

Fig 4 With an extra person helping, pull the top taut across the front bow. At this point it will start to look like you are getting somewhere. As the top is pulled across the bow, rub chalk over the top material where the top bends around the front edge of the bow. (See the dotted line in photo 4) This reference point is important.
- Fold the top back and slip some newspapers under the edge. Coat the underside of this edge with contact cement about as farback as the chalk line extends on the other side. Also coat the underside and inside lip of the metal bow where the metal weatherstrip holder had been riveted.
An important word of caution at this point! The chrome tensioning bar hinges are a danger zone for your new top!!! There is a scissor action here and it will eat a little hole in your new top! Pad these areas with cloth when you are working. After you are finished check out a way to keep them padded.
- Let the cement dry. Lineup the center marks. Start from the center and using the line drawn in the previous step, start to attach the material to the bow. Instead of going exactly back to the line, stretch it about 1/8 of an inch past the line so the top will be little tighter. If you attach the cemented areas in a way you are not happy with, pull them apart, reglue, and take a coffee break as the glue dries again.
- As you get to the two ends of the front bow the material will need to be notched to help it bend around the curve. (See photo 5)

Fig 5 The notches will be about one inch apart and come in about five inches from the ends. Don’t cut in any closer than a half an inch from the chalk marks. As you come around the curved ends of the bows where the notches are, pull the vinyl and stretch it so it lays smooth and tight on the top of the bow. The material will have to overlap itself through this notched area. Don’t hesitate to pull things apart and reglue them for a better fit. Just be careful when pulling near the notched areas so that you don’t start a rip. In fact, be careful pulling anywhere on the top with too much force. As you work, snap the bow in place to see how it is stretching. It may seem a little tight at first. Certain wrinkles will be removed when the back is stretched.
- When the front is done, chalk center marks on the top from inside the car. Also do the body metal. Release all tension on the front of the top. Put a screw through the center hole of the back aluminum strip. Allow about 1/4 of an inch of material to extend past the bottom of the strip, center it to the chalk mark and screw it to the body loosely.
- Work from the center out. Pull the material down with the pliers and use the awls to locate the old holes and install the screws loosely. After the strip is about two-thirds finished, working out from the center, stop and remove the center screws again and re-tension the material using the pliers. Make the hole for the new position and this time tighten the screws again working out, re-tensioning as you move out. NOTE: The top does not get screwed under the two small copper colored aluminum strips from the back cockpit.
-

Fig 6 Snap the top up, and go back and make adjustments for any wrinkles that remain.
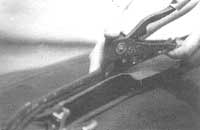
- Replace the front weather-strip holder. Use the awl to find the holes and rivet into place. (See photo 6) When you are happy with the total fit trim the material.
I hope your job comes out as nice as mine did.
