
by Bob Sharkey in the July 1996 RootesReview
The project begins with the desire to have an Alpine with a little more zip than original 1725cc engine could provide. At the Sunbeam United in Charleston, South Carolina a few years ago, I met Joe Rodriquez of Tacoma, WA. Joe and his brother Frank, who arrived at the United with two V6 converted Alpines.
Joe’s car has a turbocharger on it, and the engine and drive train were reworked extensively. The car Frank was driving had just the basic conversion with a 4-barrel Holley carburetor. After having a chance to drive Frank’s car, I was hooked! I talked in length with Joe about how he did the conversions. Joe told me how he had designed the motor and transmission mounts and other parts needed to complete the conversions. He was willing to share his knowledge and parts to allow me to do a V6 conversion, so he became the prime supplier of conversion parts that made this project happen.
After returning to New Jersey, I started my search for a Mustang II with a 2.8 Liter V6 and 4 speed transmission. It took a few months, but I located a complete car with a bad engine. My friend George Dorylis worked with me for the next few months to accomplish a complete engine rebuild and fabrication of other parts to complete the conversion. My plan from the start was to rebuild the engine completely, so this car provided me with everything I needed for a reasonable price. I pulled the engine and transmission and started to have the rebuilt. I placed my order with Joe for motor and transmission mounts and a set of exhaust headers.
 I also continued to pursue a 5- speed transmission from a Thunderbird Turbo 4-cylinder (83-89) to use. The T-5 transmission is the model that Joe recommends as the best match to the 2.8 bellhousing. If you choose the 5-speed, you will need a pilot bearing adapter, since the input shaft on the T-5 is shorter than the 4-speed transmission. I was able to find a 5- speed transmission that I could afford before the project got too far along. George made a pilot bearing adapter for me on his lathe, but you can purchase this adapter from Joe if you need one.
At this point, I had received the motor mounts and exhaust headers from Joe. The quality of both these items was excellent in appearance and design. As I embarked on the engine and transmission removal from my Series V Alpine, the V6 engine rebuild was completed.
There are no real engine compartment modifications required for this installation other than the welding of the front motor mount base to the front cross member. You will have to grind off the old Alpine motor mount steps to give you clearance for the new mounts and front of the motor.
Once you have your V6 motor assembled with the bellhousing and transmission, you’ll want to put the drive train on an engine crane to place the front motor mounts for welding. The back half of the base of the motor mount extends off the cross member, so you will have to fabricate a piece of metal to support the mount, and it should be welded into place with the motor mount base. I used a heavy gage exhaust pipe and cut it to fit against both of the surfaces. To insure correct placement of the front motor mounts, bolt the transmission to the rear mount and bolt the transmission to the car. This will give you the correct front to rear distance, and you then move the engine to center it in the engine compartment. You’ll also need to have the exhaust headers installed on the engine before you make your final front motor mount placement. As each car is a little different, you may see a need to bend some of the engine compartment sheet metal to give enough clearance for the headers, but this should not require any cutting, just forming with a big hammer! After all looks good, mark the cross member for front mount placement and remove engine/trans for welding.
The radiator issue can be solved by having a 3-core heat exchanger installed into your Alpine tanks and mounting brackets. I do not know if radiators from other cars will fit or not. The new core was Joe’s suggestion and it worked the best for me. You will also notice that the inlet and outlet pipes to the radiator have to be moved to opposite sides from the original Alpine configuration. The radiator shop should also be able to do this for you when you get the new core installed. If you were smart you would have marked the new inlet/outlet locations while you had the engine in the car for the motor mount placement. Another item in the cooling system that needs to be altered is the lower water inlet neck on the engine. The neck needs to be cut and angled toward the front of the car so as to allow enough clearance between the neck and the cross member once the engine is installed. You may want to talk with Joe about how to do this, as there are a couple of ideas on how to cut the angle of the neck.
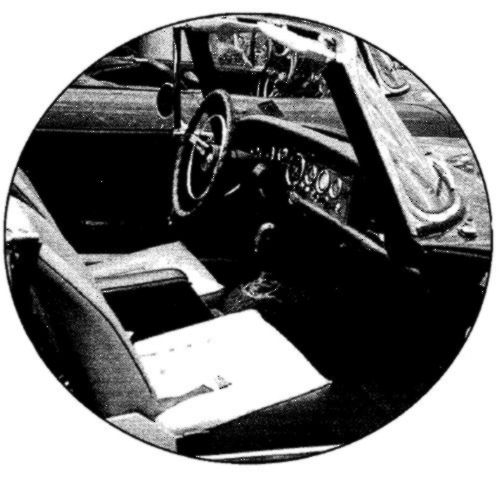
 You will notice that when you are placing the engine and transmission that the drive shaft tunnel has to be modified to accept the Ford transmission (despite what I said earlier). Take your time and think about how you will cut the shaft tunnel, so that you can reuse as much of the original metal as possible. How you rework this area is up to you and your skills with sheet metal. I was able to reuse the top and rear sections of the original tunnel in my car. Also included in this area is how you will release the clutch. I have designed a bracket which allowed me to use the Alpine clutch slave cylinder to actuate the throw-out bearing lever. My design required a little more sheet metal removal in the tunnel than if you used an internal throw-out bearing assembly. Joe recommended the internal throw-out bearing assembly, but it is much more costly than the set up George made for me. I had to do some experimenting with different master cylinders for the clutch. The original Alpine clutch master cylinder does not provide enough volume to move the release lever far enough to release the clutch. I tried a couple of old brake master cylinders from some American iron, but the bore was too large and the pedal was fairly stiff. I have now installed a Series V brake master cylinder and it gives me enough volume and soft pedal too! Joe can provide the correct manufacture for the throw-out bearing assembly and an adapter to mount it within the bellhousing.
You will also need to modify the steering link that goes behind the engine. The original Alpine link will hit on the Ford bellhousing. You can make a modified one from your old link and two new tie-rod ends from a Ford Fiesta. Measure the old link for the distance between the center of the mounting bolts before you cut it up. This distance should be 22 inches on center. You need to add enough threaded rod on each end of the solid center section to allow for the correct length adjustment of 22 inches. When installed in the car, you adjust the link to be up and away from the rear of the engine. This will give the needed clearance when you turn the steering into the stops. Again if you do not have the resources to do the welding, you can purchase a new link from Joe.
You will have to get a drive shaft made to adapt the Ford transmission to the Alpine rear end. My friend George did the welding to combine the two drive shafts into one. You can have this done in a local machine shop if you do not have the resources at hand. If you are going to use the Alpine rear end it is advisable that you acquire new “hardened” axle hub keys. I found the correct size at a heavy equipment repair service. Two reasons for replacing the keys: one the old keys maybe worn, and second the new engine will be putting a lot more torque on the axles and the original keys may break.
Other areas of consideration are: alternator, battery, exhaust, and carburetor/ intake manifold:
- I replaced the Lucas alternator with a current Delco alternator with a self contained regulator unit. The Ford alternator from the Mustang II was very large and had more wires on it than I wished to deal with in the Alpine wiring harness. The Delco was easy to install with a couple of homemade brackets, thanks again to George. I am sure that you can buy some of these all purpose brackets that could do the job just as well. I of course removed the Lucas voltage regulator from the wiring harness too! Now, I have an electrical supply easy to repair anywhere.
- Depending on how you plan to run the exhaust system on your car will determine whether or not you move the battery. I wanted to put dual exhaust all the way to rear of the car, so I removed the battery box from the floor behind the passenger’s seat. I installed a battery box in the boot (trunk). You will need a longer cable to reach the starter if you move the battery. You can have a new cable made or make it yourself depending on your skills.
- I had my exhaust system installed at the local “Meineke Muffler” shop. They were the only shop in my area with a pipe bending machine and they did a great job too! I had them run the exhaust pipes along the outside frame from the headers and then into center of the car going under the rear axle. I guess you could go over the axle, but that would have added to the cost and I didn’t feel it was necessary. I had them install the mufflers under the boot floor in back of the axle. I had them use 2 inch pipe with good support hangers and used the Alpine rubber shock mounts at the rear of the mufflers for noise isolation. You could put the mufflers under the floor pan and dump the exhaust out in front of the rear wheels if you want, but I think it will be very loud when you are running with the top down.
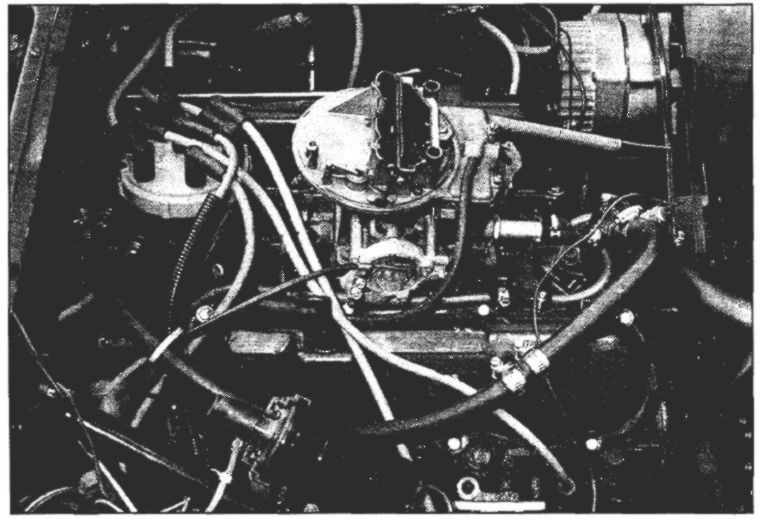
 Carburetor/intake manifold on my car is currently the original equipment. Since then, I have acquired a 4-barrel carb (Holley 390 CFM) and an Offenhauser intake manifold. To the best of my knowledge there were no factory 4-barrel setups, so this is somewhat of an option to add to your engine if you have the resources. Since the 2.8 Liter engine is no longer in production, it will take some time to acquire one of these manifolds, but happy hunting if it’s your thing. The car will run just fine with the original carb and manifold.
I hope that I haven’t left out any important items; if you are considering a V6 conversion and you have questions give me a call. I enjoy talking about the project and I may be able to help resolve your questions.
Comments (3)
Very well written article Bob. Saw your car at the United XXXV.
Had my ’67 Sv Commodore Blue V6 conversion there also. I started my V6 conversion sometime back on one of my other Alpines a ’65 SIV GT that was originally an Automatic. It had the Borg Warner BW35, replaced long ago before I became the new owner in 1980.
Bought a “kit” But was not satisfied with the poor design in several areas such as the engine mounts sitting off the rear of the cross member with a solution given to weld a piece of exhaust pipe for support. I was especially unhappy with the headers sticking out the side of the car. After much trial and error I designed my own individual components for installing the 2.8 V6 into an Alpine.
It took a few years to find a “Fabricator” for the Straight Back Headers which are similar to the Tiger Exhaust. Engine mounts with larger rubber biscuits available over the counter; Transmission Brackets for the late model Mustang T5’s, Automatic A4LDs and even the C3/4’s were designed & available for both type transmission Alpines (Manual or Automatic); Numerous other components are also available, just ask for PIC’s and pricing at ti*******@gm***.com
As an added note, anyone wishing to look into doing a V6 Conversion to their Alpine, I invite you to browse what I have put together in the form of a PDF that Documents the Conversion fairly well. I did not have any basic written materiel when I started, only bits and pieces gathered from a couple Forums. The latest PDF and some other info may be of interest such as Electric Power Steering and maybe an A/C unit:)
DanR
’67 SV Blue Boy 2.8 V6/T5/A/C/Electric Power Steering (EPS)
’67 SV TheGreen1 2.8 V6 T5/H&A & EPS in work.
Convert your Alpine utilizing my Special Designed Conversion Components including Straightback Headers similar to the Tiger system. Electric Power Steering (EPS) is available.
GOTO: http://danr.mhartman.net/
Here’s wishing all a Happy Prosperous New Year for 2022.
Still offering all sorts of items for the Sunbeams,
Tiger2Dan (DanR)